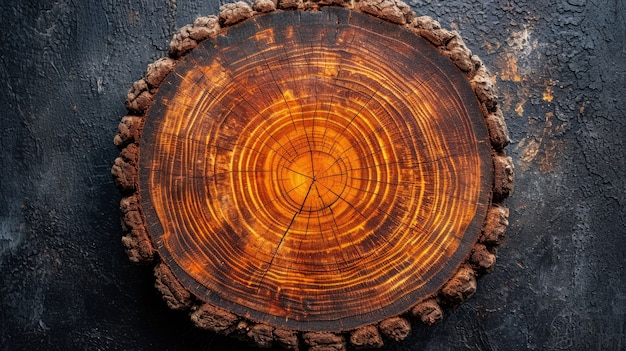
Recently, I’ve been trying my hand at making furniture and learning how to distress wood. It all started with crafting wine bottle tiki torches and has now blossomed into a love for upcycling and DIY household items.
Here’s how I got into the DIY furniture scene: After discovering that most furniture is filled with questionable chemicals and flame retardants, I began searching for more natural alternatives. However, pre-made organic furniture is both expensive and hard to come by. Buying used furniture is a great way to cut down on landfill waste, and we opt for that whenever possible. For instance, we have an old leather sectional in our living room that we snagged for $300 a few years back, and it’s the comfiest couch our kids adore.
It’s really enjoyable to restore and transform used furniture to match our home decor. The challenge, though, is finding the exact pieces and sizes we need. I had a particular coffee bar size in mind to fit a precise spot in our kitchen, but couldn’t find anything suitable. So, I decided to build it myself.
I should mention that I’m not the best with advanced power tools, so I stuck with a simple design. I aimed for a rustic look using barn lumber and steel pipes, and I’m glad to say it worked out well!
My favorite part was learning how to make new wood look like aged barn wood using a simple distressing process. I used $30 worth of wood and turned it into something that looked like it cost over $100 in reclaimed lumber. Success!
In nature, weather conditions can age the outside of wood without generally affecting its strength. To distress wood artificially, we need to imitate this process. Wood is primarily composed of cellulose, lignin, and hemicelluloses. The strong bonds within cellulose resist high tensile stresses, making wood a long-time favorite for construction.
Wood can age anaerobically (underwater or underground) or aerobically (exposed to air). The “reclaimed barn lumber” look I wanted is the result of aerobic aging. To replicate it, I needed to understand how this natural aging occurs.
Through some research, I learned that sunlight causes photodegradation in wood. This is when UV light interacts with the lignin, changing the wood’s color while typically leaving its strength intact. Wind and rain also play a role by affecting tannins, the more of which darken wood as it oxidizes.
My project goal was to recreate the lovely color of wood we found during a family camping trip in Yellowstone last summer. I certainly didn’t want to wait a decade for the color to develop, so I experimented with different methods to speed up the process. I wanted to use inexpensive and untreated pine lumber, which contains fewer tannins than woods like oak or walnut.
After diving into some chemistry research and testing, I figured out how to age wood within just 24 hours. Many online tutorials suggest using vinegar and steel wool, but this alone didn’t achieve the desired shade.
For a deeper aging effect, I added a tablespoon of hydrogen peroxide to the vinegar and steel wool mixture. This kicked off instant oxidation, helping achieve the color I envisioned. I also brewed a strong tea and coffee concoction and even added a splash of red wine. This pre-treatment, rich in tannins, prepared the wood for the iron acetate stain.
The result was exactly the ashy grey aged look I was going for using natural ingredients I already had at home. The process cost almost nothing!
Here’s a quick guide on how to age wood in a day. Test this on a small piece first to make sure you get the color right. While the vinegar dissolves the iron oxide on the steel wool, the tea steeps and increases tannin content. I left them both overnight, though you could leave them for anywhere from 3 hours to a couple of days.
Once ready, strain the tea or coffee and keep the liquid in a mason jar, adding 1/4 cup of wine if using. Stir in 1 tablespoon of basic 3% hydrogen peroxide to darken the mixture. Straining the steel wool is optional.
Now, using a brush or cloth, apply the tea/coffee/wine mixture to the wood, ensuring even coverage. Let it dry completely for about an hour. Don’t worry if it doesn’t darken the wood much; the real change happens next.
Brush on the vinegar/steel wool/hydrogen peroxide mix, making sure to cover all areas. You’ll notice the wood start to darken within seconds, with the full color developing in the next few hours. If needed, add a second coat. Let this completely dry for at least a few days. You can store the vinegar mixture indefinitely; just keep it in a cool, dark place.
After a week, I sealed the wood using a homemade furniture wax, though any natural wax or even olive oil can provide protection. For kitchen use, I’d recommend sealing to prevent water damage.
For those curious about the science behind this method: Acetic acid in vinegar reacts with iron oxide (rust) on the steel wool. Hydrogen peroxide boosts oxidation since vinegar alone isn’t strong enough. Tannins are oxygenated molecules that bond with iron acetate to create a colored effect, giving the wood an aged look.
And there you have it—how to distress wood! Look out for my post showcasing the finished coffee table project soon. Are you into DIY projects too? Let me know what you’ve created!

