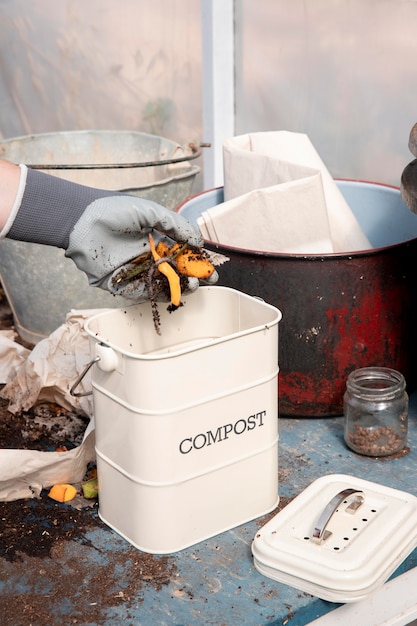
One of the key principles in organic gardening is to nourish the soil rather than just the plants. A simple and cost-effective way to do this is by composting your kitchen and yard waste, which turns into rich organic fertilizer. Composting is straightforward and can be done just about anywhere, even if you live in an apartment, so there’s no reason not to give it a try!
There are plenty of reasons to start composting. For one, the EPA estimates that food makes up 22 percent of the solid waste in landfills. Composting can help redirect a lot of that organic material away from landfills. While it’s still crucial to reduce food waste by eating leftovers and using produce before it spoils, we’re all bound to have some waste. Composting any unavoidable kitchen scraps is a fantastic way to cut down on food waste. You might be surprised at the variety of things you can compost, from inedible parts of vegetables to nutshells and even things like toenail clippings.
The quality of most food today has diminished because it’s often grown in nutrient-poor soil, which leads to nutrient-deficient produce. By composting food waste, nutrients can be returned to the soil more efficiently than if those scraps were just thrown away. You can compost all year, even in colder climates. The process might slow down in winter, but it doesn’t stop.
Composting your kitchen and yard waste results in a perfect soil enhancer. Adding compost to garden beds boosts plant health and helps ward off diseases and pests. It also helps balance soil pH for a healthier garden. Best of all, homemade compost is essentially free and can quickly enhance your garden’s productivity.
While organic matter like kitchen scraps, grass clippings, and twigs will eventually decay on its own, composting speeds up the process under ideal conditions with the help of microorganisms. The ideal conditions include:
Once these conditions are achieved, composting gets underway.
Composting involves three stages, and once it’s ready, you can use it to fertilize your garden or perhaps share it with a neighbor!
Now that you know how it works, let’s look at the steps to get started. If you have outdoor space, choose a suitable spot for your compost pile. Find a sunny spot that’s well-drained and accessible.
For those in urban areas without outdoor space, options like an indoor worm composting bin might work, or you could use your city’s municipal composting program if available.
After selecting your composting location, you’ll need to figure out which type of compost bin suits you best. There are three main types:
There is a wide variety of composting bins, from simple to more elaborate designs. Some have compartments for different stages of decomposition. Choose what’s most practical for you and your situation, but remember that simple solutions often work best.
To start composting, you’ll need two types of materials: green (nitrogen-rich) and brown (carbon-rich). Green materials heat the pile while brown materials provide energy for microbes to break down the scraps.
Avoid adding diseased plants to your compost as they can spread disease to your garden.
If your compost pile starts to smell, add more brown materials. If it’s slow to break down, add more green.
“Kitchen scraps” can encompass many things. Here’s what can be composted:
Avoid oils, meats, dairy, and other animal products to prevent pests, although they can be composted if your pile is hot and well-balanced.
You can keep your scraps in a simple bowl on the counter or opt for a more decorative container like a stainless steel canister, which often comes with charcoal filters to control odors.
Once you have your compostable materials ready, start composting by mixing 2 parts brown material with 1 part green. Keep your brown materials handy in a container near your compost bin and add them alongside your kitchen scraps regularly. As you build your pile, water each layer to ensure it stays damp.
Maintain your pile by keeping it moist, aerated, and adding new materials. When it reaches about 4 feet square, stop adding materials and let it decompose. Turn the pile weekly to introduce oxygen and maintain moisture.
After several months, your compost should be ready for use. Use a shovel to spread it in your garden. A few undecomposed scraps are okay, but if there’s a lot, give it more time to finish composting.
An organic compost starter can help speed up the process.
Overall, starting a compost pile in your yard is simple and benefits both your garden and the environment. Follow these easy steps to transform kitchen waste into valuable compost. It’s a win-win!
Have you ever tried composting yourself? How did it go?

